Quick Start Guide: build your first project
In this guide we'll take you through everything you need to build your first fully functional AI Project using Phacet.
In a few simple steps, you will be able to automate your document workflows, replace manual spreadsheets, and make sense of messy data.
Core concept 1 : AI Tables
An AI Table is a structured dataset made of rows and columns, where each column can run AI, code, or web-based transformations at scale.
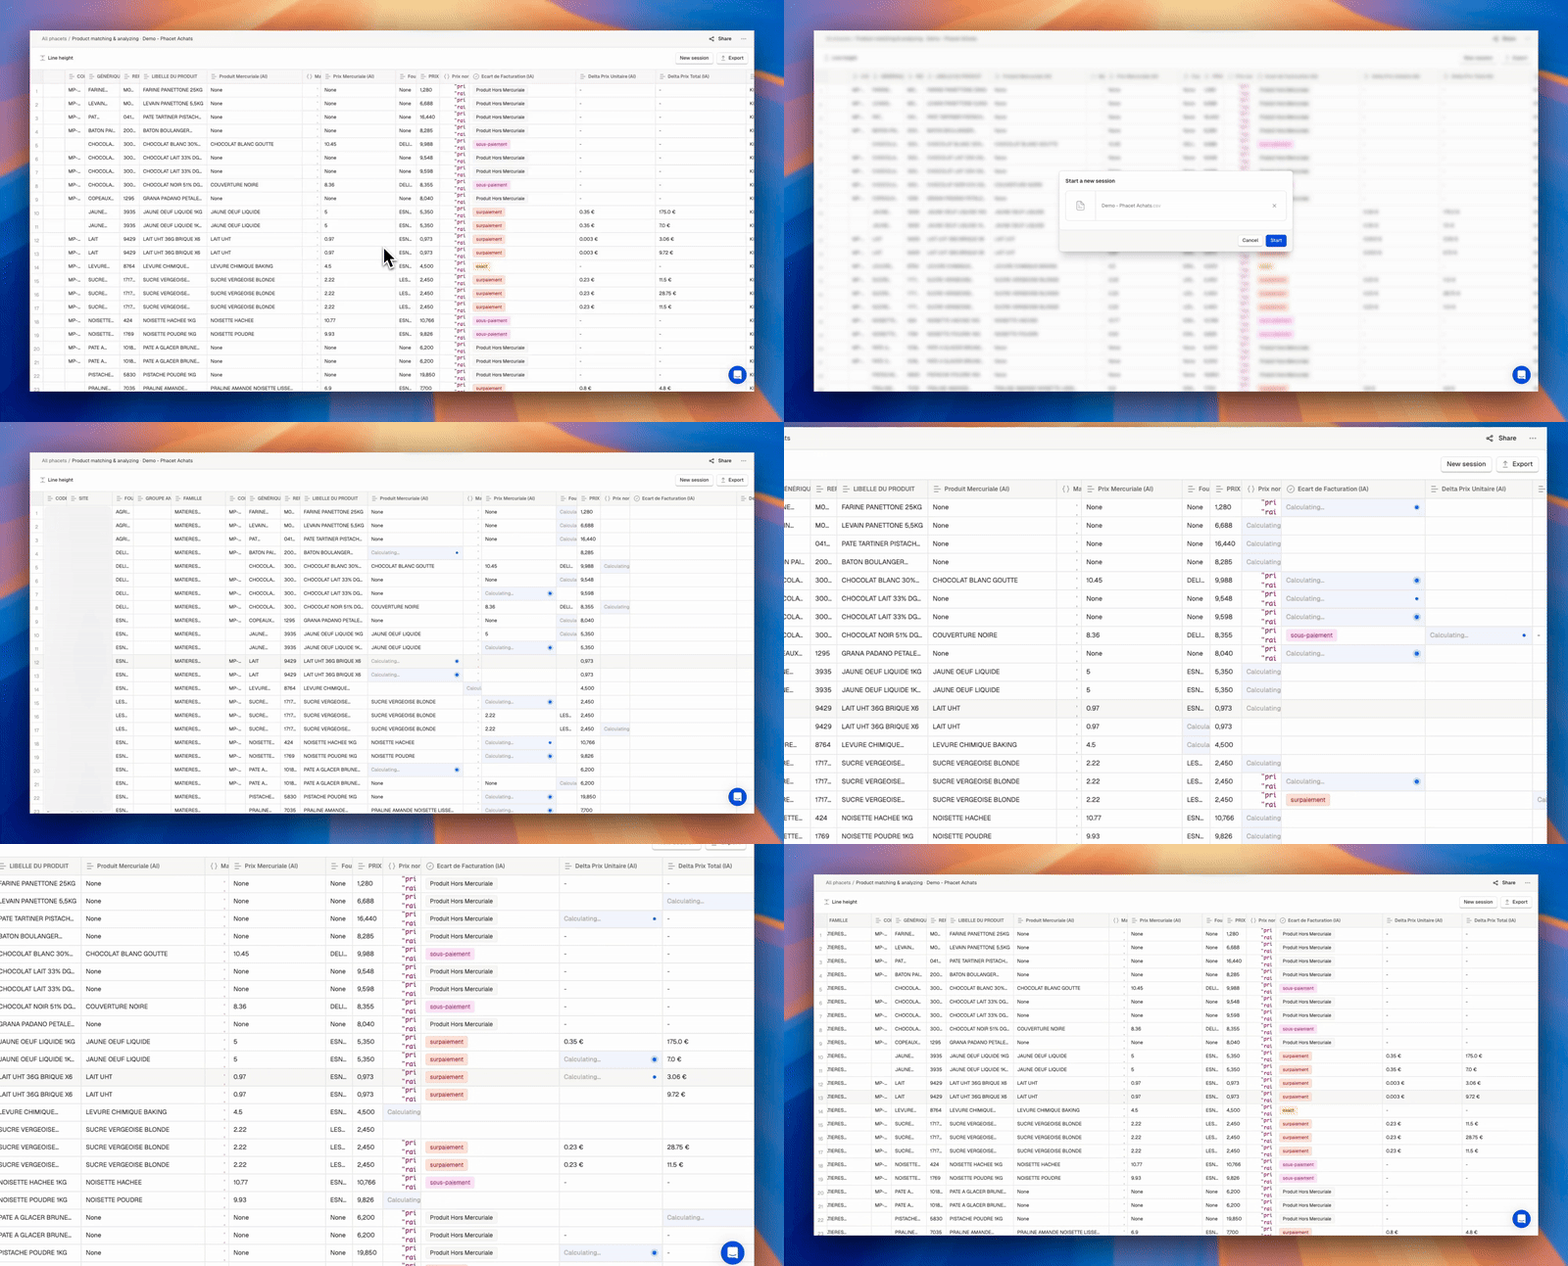
AI Tables are edited and operated through a spreadsheet-like interface, making it easy to configure workflows, review results, and iterate. Unlike spreadsheets, AI Tables don’t just calculate values: they run AI, code, and external tools on your data.

Use AI Tables to configure workflows and easily review and export results.
Core concept 2 : Projects
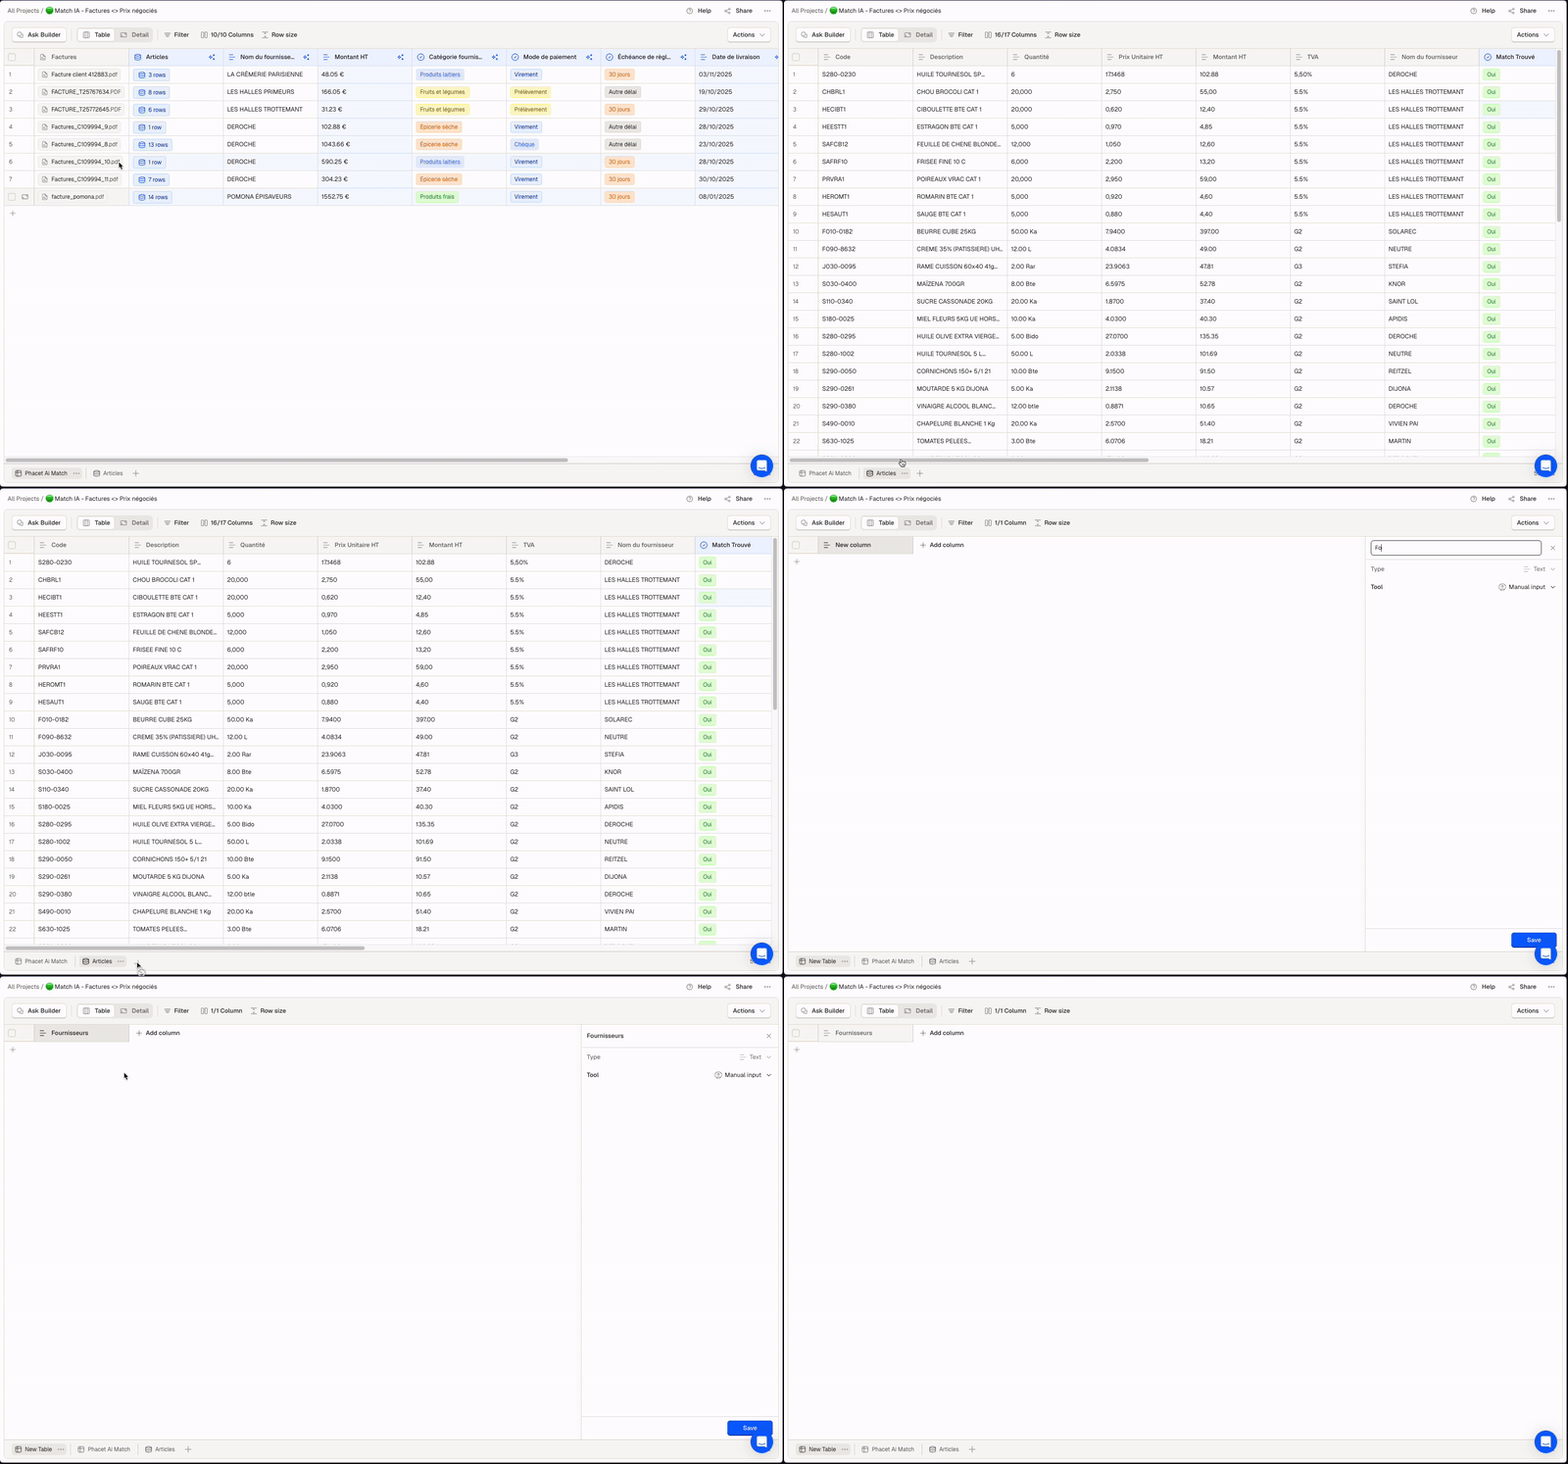
Projects are containers that allow you to groups AI Tables that belong to the same business workflow or operational domain.
Companies use AI Tables and Projects to:
- Generate and categorize product catalogs
- Extract structured data from invoices or contracts
- Reconcile bank and accounting records
- Route and tag emails in a shared inbox
- and many more workflows

Access Multiple AI Tables from a single project (ex. here for Invoices analysis)
1. Create your first Project
- Click New Project in the top-right corner.
- Choose how to start:
- Start from scratch: Creates a Project with an empty AI Table, ideal for extracting data from documents or building a novel workflow. Manually add columns and define AI or code tools.
- Start with CSV: Creates a Project with an AI Table pre-populated with your imported data. Review imported columns, then attach AI or code actions to existing data.
2. Understand the AI Table structure
AI Tables are made of 3 important elements:
Columns
- Columns represent a specific type of data that can be used either as an input for calculation or as an output. Their format is constant in the whole column, and can be specified in the column Settings.
- Tools can be set at a Column level to extract and generate data, from scratch or in interaction with a surrounding property.
Rows
- Rows represent a single record in an AI Table.
- Each row contains all the relevant details of a record, as a set of input and output data.
Cells
- Cells are the individual items in an AI Table, that contain custom data related to each row.
- Cells can either be used as an input or display the results of a calculation.
To illustrate how to set up and use each of those elements, let's create and set up an “Invoice” AI Table that will categorize and extract key data from invoices.
3. Import your data
Before importing, set up your input columns to receive your data.
Set up input columns
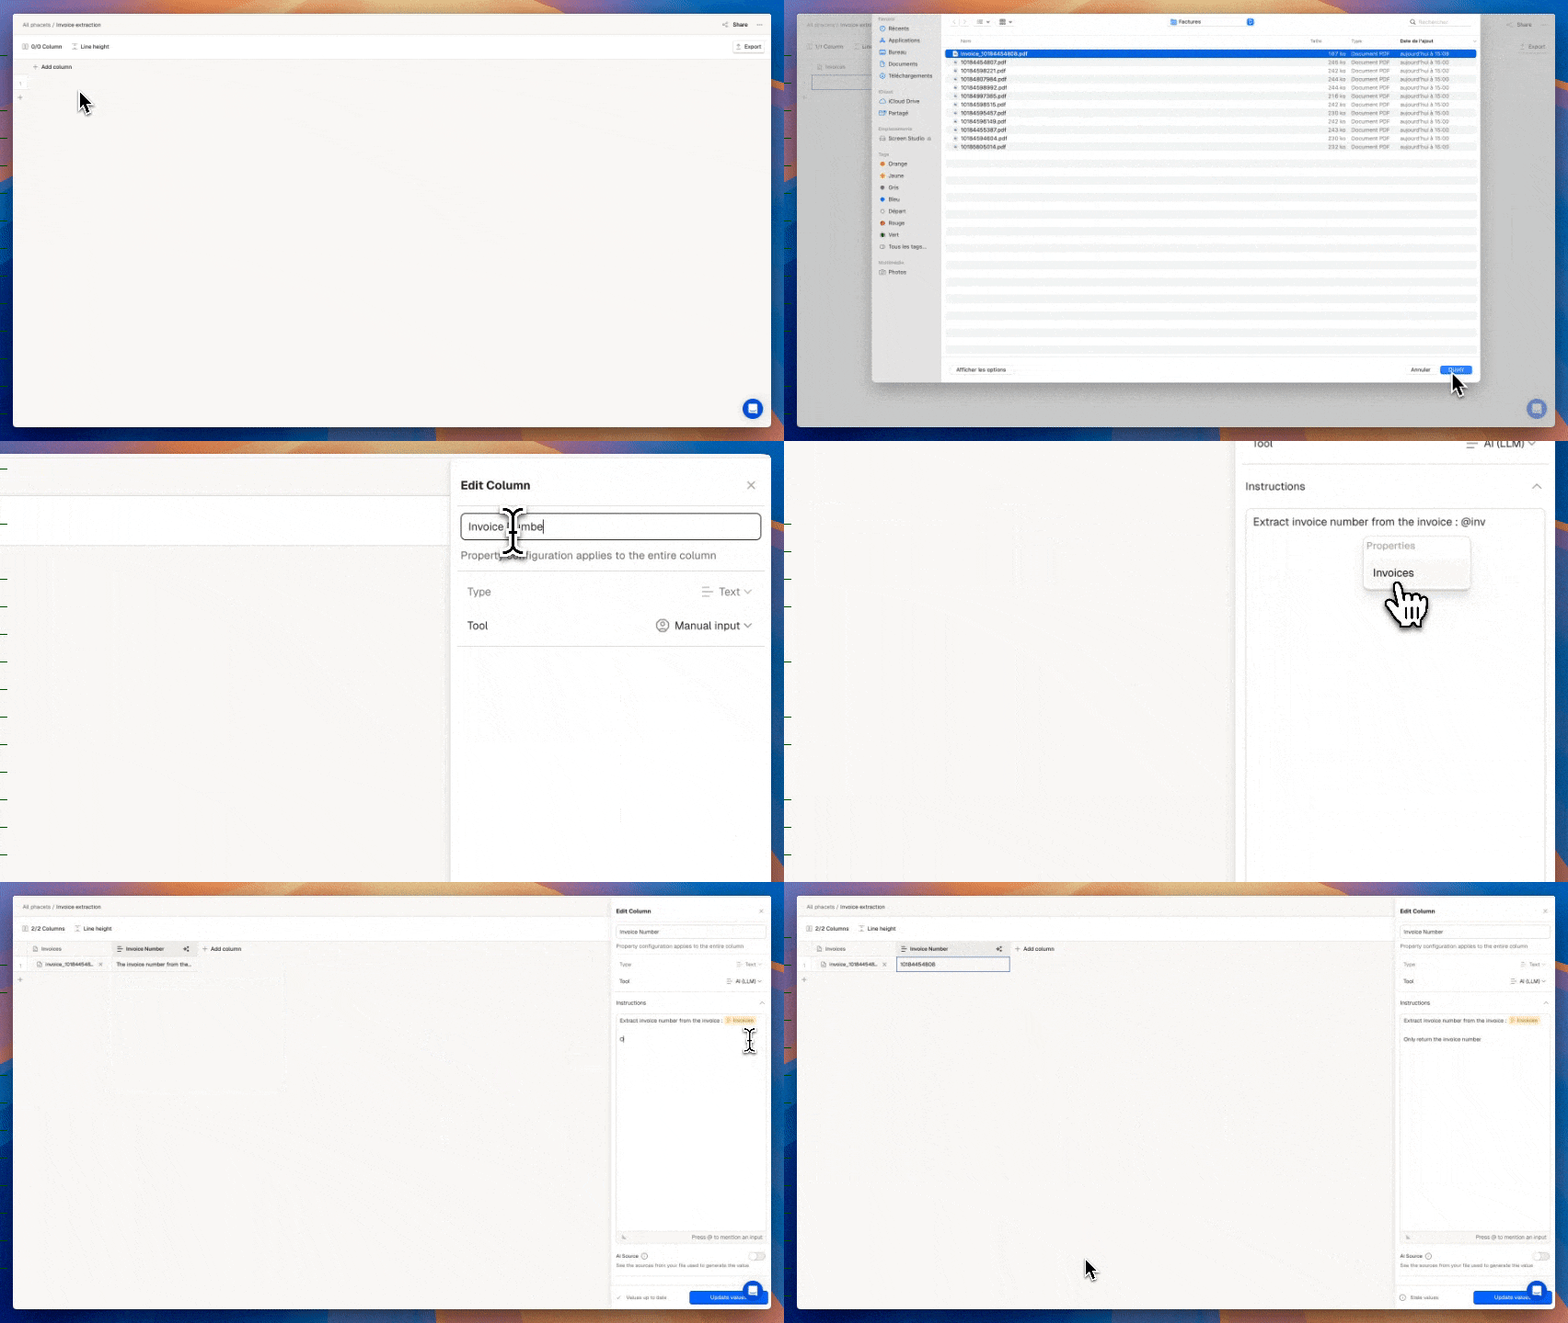
- Click + Add column.
- Enter a Name.
- Select the Column Type matching your data (File, Text, Number, Date...).
- Select the property Tool → User input.
- Repeat for each input column you need.
Import your data
Once your input columns are ready, import your data:
- Add row: Click on Add row to create rows manually and fill in values.
- Drag and drop: Drop files directly into the related file column.
- CSV import: Import a CSV file matching your column structure.
You can import multiple files or CSV files with thousands of rows at once. New rows will be automatically created.
Tip: You can also automate adding new rows using our API or integrations with Zapier, Make & n8n.

Create and set up your columns in 3 simple steps
4. Configure your transformations
Add dedicated columns to process your data using AI, Web Search or Code.
In our example, we have a collection of Invoices that we want to categorize and analyze with an AI Tool.
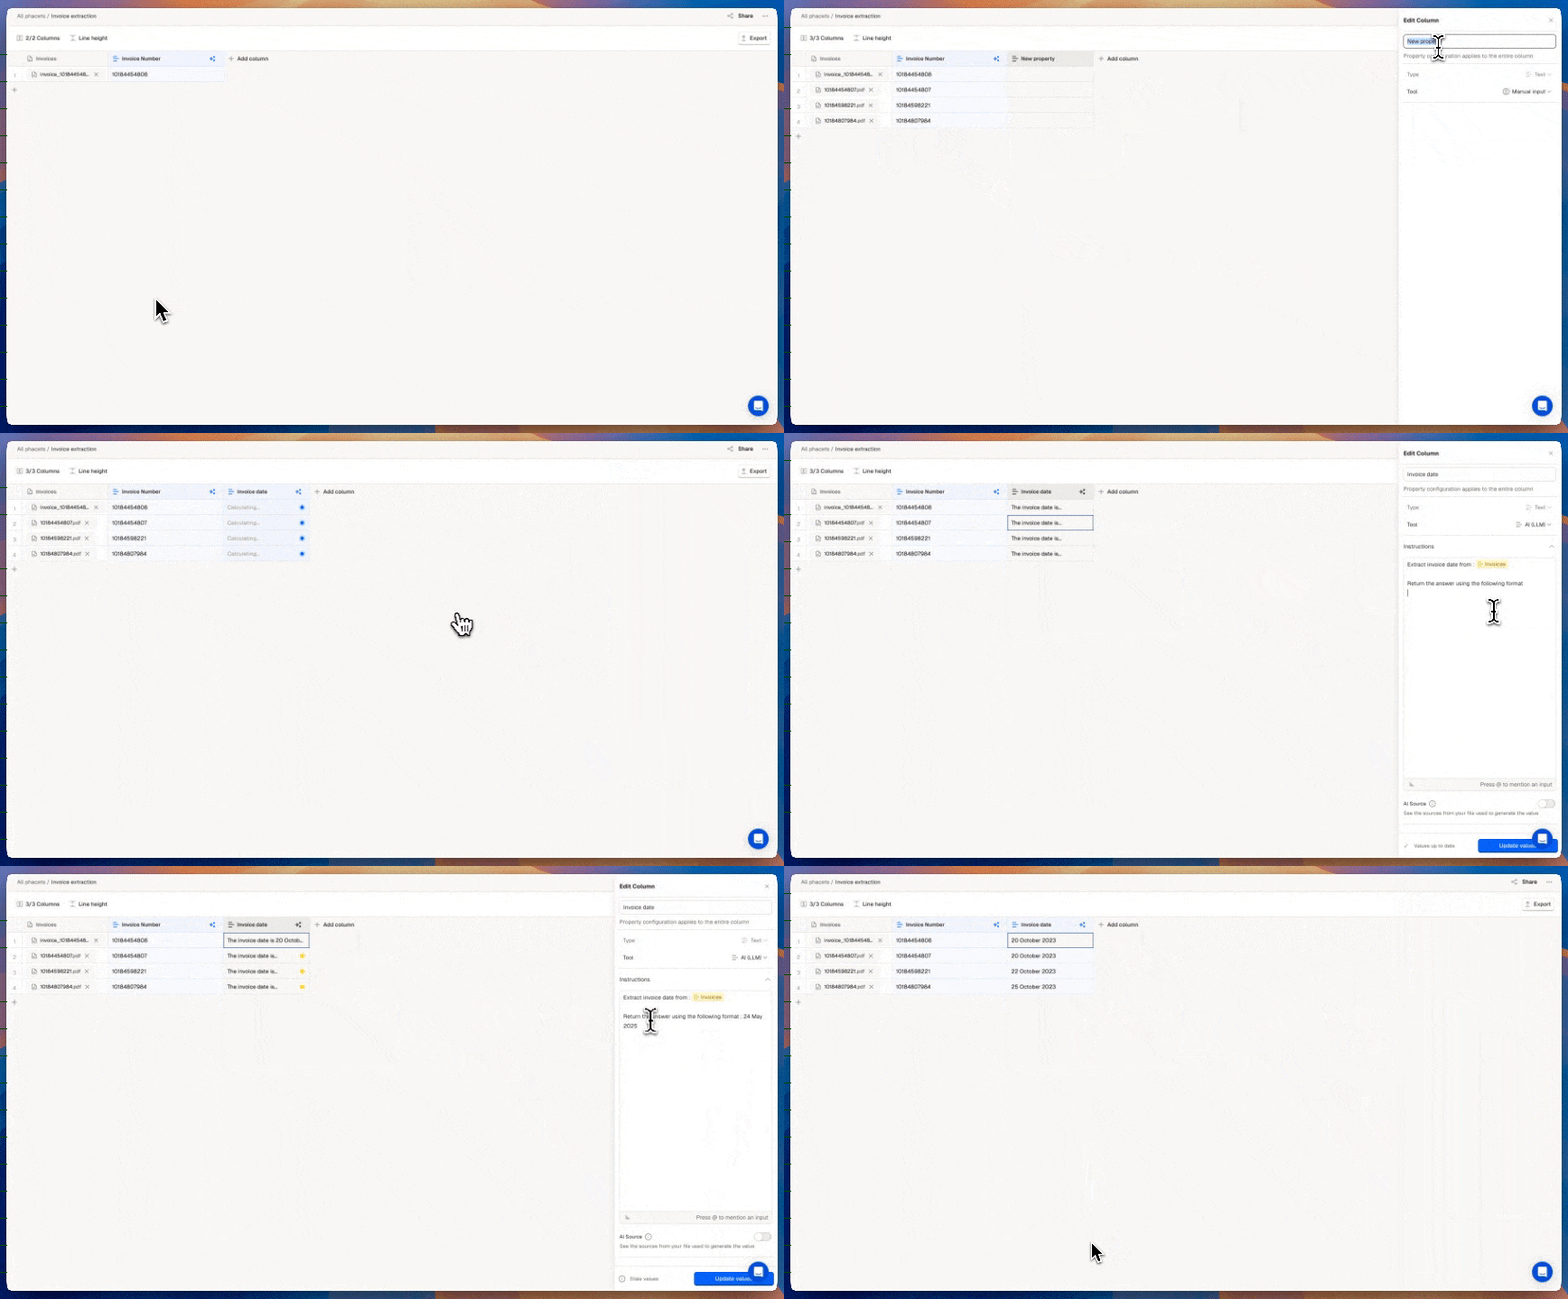
Add a transformation Column
- Click + Add column.
- Enter a Name.
- Select the output Column Type (e.g. Text, Number, Date...).
- Select the Tool (AI, Code, Web Search...).
- Enter your Prompt or Script.
- Reference input columns with
@ColumnName. - Click on Generate values.
Every column can have a specific type, which dictates how the data inside is stored and visualized. Column types allow you to standardize and capture dynamic information.
Configure as many transformation Columns as you need to represent your entire workflow.

Apply AI-Based or Code based transformations to each Column
Troubleshoot:
- Check prompt clarity and input references.
- Adjust column settings (type, tool).
- Our future troubleshooting guide will soon help you solve the most common errors.
5. Test, review results and iterate
Before running your AI Table at scale, validate your setup on a small sample. This helps you catch configuration or prompt issues early and avoids unnecessary processing.
Start with a small test set
- Create 1 to 3 test rows.
- Import representative data:
- Drag and drop files into File columns.
- Paste a few CSV rows directly into the table.
- Import a CSV with a single row and all required columns.
Generate and review results
You can trigger generation at different levels:
- Column level: Column menu → Generate values to process all cells in a column.
- Row level: Click Generate row to process a single row.
- Cell level: Right-click a cell to generate or regenerate its value.
Review results column by column:
- Check that inputs are correctly referenced.
- Verify output format matches the column type.
- Confirm AI or code behavior matches your intent.
Iterate on your configuration
If results are not what you expect:
- Refine prompt wording or instructions.
- Adjust column type or tool selection.
- Regenerate on the same test rows to compare results.
Once outputs are correct on your test set, you can safely process larger volumes.
Tip
Iterating on a few rows is the fastest way to converge on a reliable configuration before scaling to hundreds or thousands of records.
Check out our Prompting Tips guide to create prompts that deliver accurate results for your use case.
6. Export results
Export your AI Table's data—both inputs and outputs—for reporting, analysis, or integration with other tools.
- Click the Export button in the top-right toolbar.
- Choose your format: CSV or Excel.
- Click Export.
Tip: You can also automate sending results to other tools using our API, webhooks, or integrations with Zapier, Make & n8n.
Once your tests are complete and results align with your expectations, you can start using your Phacet.
Organize your data with sessions
Sessions let you group, process, and review batches of rows within a single Phacet—ideal for recurring workflows or large, segmented datasets.
Create a dedicated session for each batch and import related data within that session. You can then switch between sessions to review the results.Quick Start Gui
Updated 10 days ago